QuickBath Panels
Waterproof Tub & Shower Panels
Sophisticated Look
Affordable Quality
Easy to Install & Clean
What are QuickBath Panels Used For?
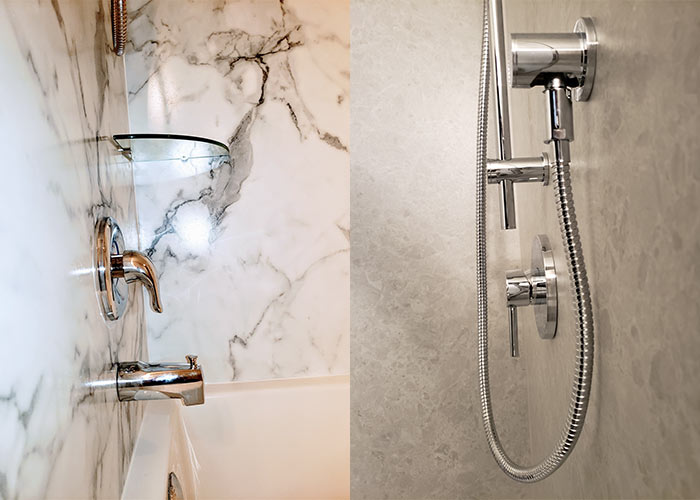
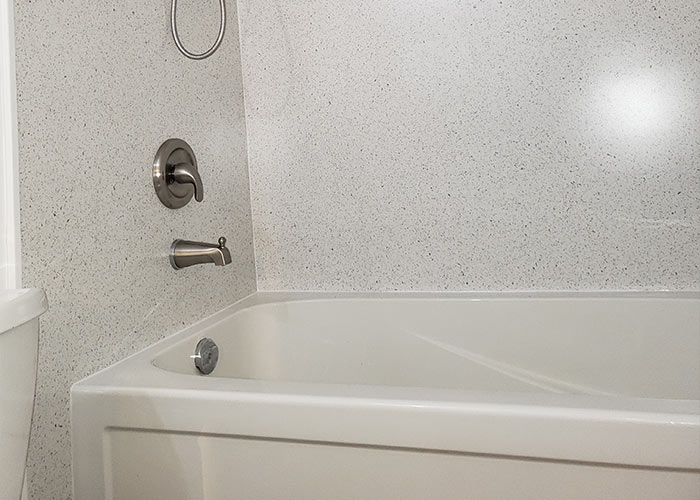
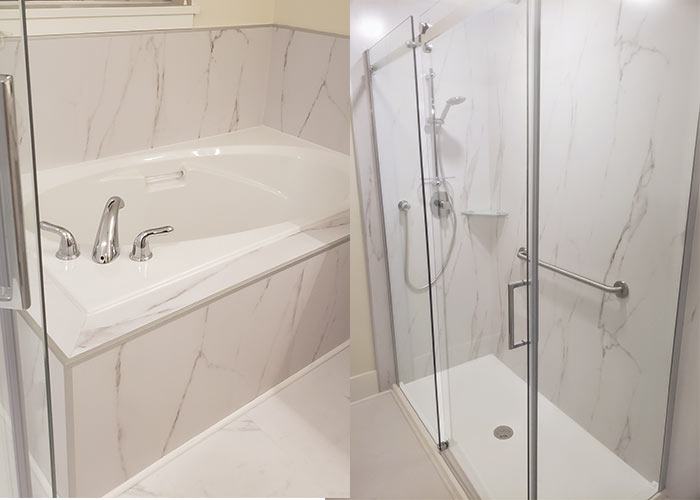
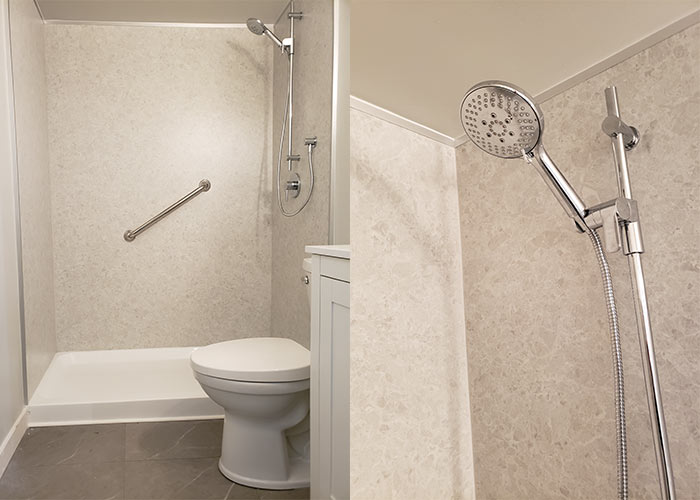
A perfect solution for tub and shower surrounds, kitchen and bathroom backsplashes, feature walls, and more, QuickBath Panels excel in various applications.
Waterproof, groutless, and effortless to clean, they’re also easy to install in just a few hours. Whether for retrofitting or new construction, they seamlessly adapt to all standard shower bases and tubs for a polished finished look.
Where innovation meets versatility.
QuickBath Panels (patent pending) combine a waterproof laminated thermoset decorative finish with a high-density foam core reinforced with fiberglass mesh.
With sizes up to 1524 mm x 3657 mm (5’ x 12’) and over 60 colors/patterns to choose from, QuickBath Panels are a grout-free solution to remodelling your bathroom.
Elevate Your Space with QuickBath Panels
A Clean & Sophisticated Look
QuickBath Panels offer a clean and sophisticated look with many colours and design patterns to choose from (which can command higher rent or resale value).
Easy to Lift, Carry & Install
Can be Installed Directly Over Several Surfaces
QuickBath Panels can be installed directly over several surfaces including drywall, plaster, tile backer board, plywood/OSB, brick, concrete and existing finish that are structurally sound (e.g., tile).
Easy Installation
Quickbath Panels can be installed by contractors, handypersons, property maintenance staff, or anyone who knows how to use basic tools.
A Clean & Sophisticated Look
Quickbath Panels offer a clean and sophisticated look with many colours and design patterns to choose from (which can command higher rent or resale value).

Easy to Lift, Carry & Install

Can be Installed Directly Over Several Surfaces
Quickbath Panels can be installed directly over several surfaces including drywall, plaster, tile backer board, plywood/OSB, brick, concrete and existing finish that are structurally sound (e.g., tile).

Ceiling Installation
They can be installed on ceilings too (e.g., tub and shower alcove ceiling).

Quickbath Panel Installation Benefits
Simple Process Saves Installation Time
No Field Seam
Efficient Installation
QB Waterproof Panels Instructions
Material you will need:
- Silicone and/or construction adhesive
- Pencil
- Masking tape
Tools you will need:
- Measuring tape
- Pencil
- Circular saw equipped with a finishing wood blade (recommended)
- Hole saw or Jig Saw and drill bit (for water supply lines)
- Hacksaw or mitre saw (to cut the provided corner trim)
- Level
- Caulking gun
- Suction cup (optional yet useful)
Material you will need:
- Silicone and/or construction adhesive
- Masking tape
Installation
Quickbath Panels can be installed directly over several surfaces and substrates including drywall, plaster, tile backer board, plywood, brick wall, concrete wall and other existing finish that are structurally sound. Quickbath Panels can also be installed on ceilings.
Install Back Wall First
- Measure width of back wall and cut to size.
- Quick tip: by subtracting 3/8 inch from the total width (but no more than ½ inch), it will make it easier to fit the panel, especially if your side walls are not plumb. The gap between the edge of the back panel and the side wall will be filled with caulking before the side panels are installed. That gap will be covered by the side panels for a tight finish.
- Measure height and cut to size.
- Quick tip: If you plan on installing panels all the way to the ceiling, measure height of the back wall and subtract up to, but no more than ¼ of an inch. Ceilings are not always flat/leveled and the gap between the top of the panel and the ceiling will be covered by the corner trim provided.
- Cut panel to size using a circular saw (a jig saw, or router can also be used). If you chose to cut the panel finish side up, apply masking tape to the base of the saw. That step is not needed if you wish to cut the panel finish side down. A wood finishing blade is recommended to produce a clean cut.
Note: Check your local building code with respect to minimum wall finish height requirement for a tub or shower surround. - Dry fit back wall panel and secure panel to the wall (see Step 3: How to secure panels).
Install Side Walls
- Measure width and height of the side walls.
- Cut to size using a circular saw. If you chose to cut the panel finish side up, apply masking tape to the base of the saw.
- Measure and cut out holes to accommodate pipes and valve using a hole saw or jig saw. It is easier to make those cuts finish side up. If using a jig saw, apply masking tape to the base of the saw.
- Quick tip: If you want to bring the panel all the way to the ceiling: measure height of the wall and substrate up to, but no more than ¼ of an inch. That gap between the top of the QB Panel and the ceiling will be filled by the finishing corner trim provided which will hide any discrepancies if the ceiling is not flat. Otherwise, cut QB Panel to your preferred height.
- Dry fit panel. Once satisfied with the fit, fill the gap between the back wall panel and the side wall with silicone, then secure panel to the wall (see Step 3 how to secure QB Panels).
- Quick tip: you can opt to end the side wall panel at the edge of the tub or shower base, or you can choose to extend the side wall panel past the edge of the tub or shower base and down to the floor level. Measure area to be covered accordingly. The use of a template can make such cut easier.
Note: vertical corners where the side and wall panels meet will be caulked at finishing stage (see Step 4: Trim installation and finishing). However, for a tight finish, scribing the side panel may be needed. A palm or belt sander can be used to sand the panel where needed.
Vertical edge of the panel will be covered with the corner trim (provided).
Note: Check your local building code with respect to minimum heigh requirement if applicable.
Install Side Walls
- Using a level, check how plumb each wall is before securing panels.
- Apply a generous amount of silicone or construction adhesive every 4 square inch or so. You can choose to spot bond or apply a continuous bead of silicone or construction adhesive.
- If walls are not flat, build up silicone or construction adhesive to ensure contact between the wall and the back of the QB Panel every 4-inch square or so.
- If walls are out of plumb or bowed, tile adhesive can be used to build up the adhesive as required.
- Silicone or construction adhesive should be applied approximately 1 inch from all outside edges (corners, top and bottom, even if you are also using tile adhesive to mitigate out plumb/bowed walls).
- Press panel into place and apply firm pressure throughout with hands to ensure full contact between the panel and the adhesive. If substrate is out of plumb/bowed and a build up of tile adhesive was needed, use a level to guide the amount of pressure required.
- When installing back panel: fill the gap between the edge of the QB Panel and the corner wall with silicone before installing side panels. It is best to measure and dry-fit the side panels before filling the gap with silicone.
- Quick tip: It is best to measure and dry-fit the side panels before filling the gap with silicone.
- For tub installation: fill gap between the pipe of the tub spout (also called divertor) and the panel with silicone.
Notes:
- The use of braces to keep panels in place until the adhesive set is not required. However, if walls are out of plumb and/or panels where not stored properly and are bowed, the use of braces or application of hot glue may be needed to hold panel in place while adhesive sets.
- Spray foam adhesive can also be used to secure the panel to the substrate (follow manufacturer instructions).
Trim Installation & Finishing
QB Panels come with a corner trim (provided) that is used to cover the visible edge of the QB Panel. A tile trim can also be used (not provided).
Surround with 3 walls:
- Start with the back wall and install top trim. Measure distance at the top of the back panel between the two side walls and cut to size. Dry fit trim. Choose a mitre cut at 45° or 90°. If your installation does not go all the way to the ceiling and a side wall panel is also installed, a 45° cut is recommended. Apply silicone on the inside of the trim and install.
- Install vertical trim on side walls: Measure height of trim and cut to size. Choose a mitre cut at 45° or a 90° cut. Dry fit. Apply silicone on the inside of the trim and install.
- Install top trim on side walls. Measure distance between back wall trim and vertical trim and cut to size. Dry fit. Apply silicone on the inside of the trim and install.
- FINISHING: Apply a bead of silicone in the inside corners (where panels meet one another) and where the panels meet the tub rim or shower base.
Trim Installation & Finishing
- Panels can rest directly on the shower base or tub rim.
- If there is a window in the tub or shower alcove, the use of natural stone or waterproof man-made material is recommended for windowsills. QB Panels can be used to finish / trim out the other parts of the window box.
- Grab bar installation: QB Panels do not offer the structural properties required for grab bar installation. Grab bars should be affixed to the wall in a location where they can be anchored to a structurally sound surface such as studs, wood blocking or concrete. Apply silicone where the screws/anchors penetrate the panel.
- Shower seat installation: QB Panels do not offer the structural properties required for shower seat installation. Shower seat should be affixed in a location where they can be anchored to a structurally sound surface such as studs, wood blocking or concrete. Adhesive should be applied to ensure full coverage at the back of the panel where seat will be anchored. Apply silicone where the screws/anchors penetrate the panel.
- Shelf installation: Depending on the product selected, shelf or soap dish should either be secured to the panels using silicone or be anchored directly into a structurally sounds surface such as studs, wood blocking or concrete. If the substrate is drywall or tile backerboard, the use of zip tie or toggle anchors is recommended. Apply silicone where the screws/anchor penetrates the panel.
Install Back Wall First
- Measure width of back wall and cut to size.
- Quick tip: by subtracting 3/8 inch from the total width (but no more than ½ inch), it will make it easier to fit the panel, especially if your side walls are not plumb. The gap between the edge of the back panel and the side wall will be filled with caulking before the side panels are installed. That gap will be covered by the side panels for a tight finish.
- Measure height and cut to size.
- Quick tip: If you plan on installing panels all the way to the ceiling, measure height of the back wall and subtract up to, but no more than ¼ of an inch. Ceilings are not always flat/leveled and the gap between the top of the panel and the ceiling will be covered by the corner trim provided.
- Cut panel to size using a circular saw (a jig saw, or router can also be used). If you chose to cut the panel finish side up, apply masking tape to the base of the saw. That step is not needed if you wish to cut the panel finish side down. A wood finishing blade is recommended to produce a clean cut.
Note: Check your local building code with respect to minimum wall finish height requirement for a tub or shower surround. - Dry fit back wall panel and secure panel to the wall (see Step 3: How to secure panels).
Install Side Walls
- Measure width and height of the side walls.
- Cut to size using a circular saw. If you chose to cut the panel finish side up, apply masking tape to the base of the saw.
- Measure and cut out holes to accommodate pipes and valve using a hole saw or jig saw. It is easier to make those cuts finish side up. If using a jig saw, apply masking tape to the base of the saw.
- Quick tip: If you want to bring the panel all the way to the ceiling: measure height of the wall and substrate up to, but no more than ¼ of an inch. That gap between the top of the QB Panel and the ceiling will be filled by the finishing corner trim provided which will hide any discrepancies if the ceiling is not flat. Otherwise, cut QB Panel to your preferred height.
- Dry fit panel. Once satisfied with the fit, fill the gap between the back wall panel and the side wall with silicone, then secure panel to the wall (see Step 3 how to secure QB Panels).
- Quick tip: you can opt to end the side wall panel at the edge of the tub or shower base, or you can choose to extend the side wall panel past the edge of the tub or shower base and down to the floor level. Measure area to be covered accordingly. The use of a template can make such cut easier.
Note: vertical corners where the side and wall panels meet will be caulked at finishing stage (see Step 4: Trim installation and finishing). However, for a tight finish, scribing the side panel may be needed. A palm or belt sander can be used to sand the panel where needed.
Vertical edge of the panel will be covered with the corner trim (provided).
Note: Check your local building code with respect to minimum heigh requirement if applicable.
Install Side Walls
- Using a level, check how plumb each wall is before securing panels.
- Apply a generous amount of silicone or construction adhesive every 4 square inch or so. You can choose to spot bond or apply a continuous bead of silicone or construction adhesive.
- If walls are not flat, build up silicone or construction adhesive to ensure contact between the wall and the back of the QB Panel every 4-inch square or so.
- If walls are out of plumb or bowed, tile adhesive can be used to build up the adhesive as required.
- Silicone or construction adhesive should be applied approximately 1 inch from all outside edges (corners, top and bottom, even if you are also using tile adhesive to mitigate out plumb/bowed walls).
- Press panel into place and apply firm pressure throughout with hands to ensure full contact between the panel and the adhesive. If substrate is out of plumb/bowed and a build up of tile adhesive was needed, use a level to guide the amount of pressure required.
- When installing back panel: fill the gap between the edge of the QB Panel and the corner wall with silicone before installing side panels. It is best to measure and dry-fit the side panels before filling the gap with silicone.
- For tub installation: fill gap between the pipe of the tub spout (also called divertor) and the panel with silicone.
Notes:
- The use of braces to keep panels in place until the adhesive set is not required. However, if walls are out of plumb and/or panels where not stored properly and are bowed, the use of braces or application of hot glue may be needed to hold panel in place while adhesive sets.
- Spray foam adhesive can also be used to secure the panel to the substrate (follow manufacturer instructions).
Trim Installation & Finishing
QB Panels come with a corner trim (provided) that is used to cover the visible edge of the QB Panel. A tile trim can also be used (not provided).
Surround with 3 walls:
- Start with the back wall and install top trim. Measure distance at the top of the back panel between the two side walls and cut to size. Dry fit trim. Choose a mitre cut at 45° or 90°. If your installation does not go all the way to the ceiling and a side wall panel is also installed, a 45° cut is recommended. Apply silicone on the inside of the trim and install.
- Install vertical trim on side walls: Measure height of trim and cut to size. Choose a mitre cut at 45° or a 90° cut. Dry fit. Apply silicone on the inside of the trim and install.
- Install top trim on side walls. Measure distance between back wall trim and vertical trim and cut to size. Dry fit. Apply silicone on the inside of the trim and install.
- FINISHING: Apply a bead of silicone in the inside corners (where panels meet one another) and where the panels meet the tub rim or shower base.
Trim Installation & Finishing
- Panels can rest directly on the shower base or tub rim.
- If there is a window in the tub or shower alcove, the use of natural stone or waterproof man-made material is recommended for windowsills. QB Panels can be used to finish / trim out the other parts of the window box.
- Grab bar installation: QB Panels do not offer the structural properties required for grab bar installation. Grab bars should be affixed to the wall in a location where they can be anchored to a structurally sound surface such as studs, wood blocking or concrete. Apply silicone where the screws/anchors penetrate the panel.
- Shower seat installation: QB Panels do not offer the structural properties required for shower seat installation. Shower seat should be affixed in a location where they can be anchored to a structurally sound surface such as studs, wood blocking or concrete. Adhesive should be applied to ensure full coverage at the back of the panel where seat will be anchored. Apply silicone where the screws/anchors penetrate the panel.
- Shelf installation: Depending on the product selected, shelf or soap dish should either be secured to the panels using silicone or be anchored directly into a structurally sounds surface such as studs, wood blocking or concrete. If the substrate is drywall or tile backerboard, the use of zip tie or toggle anchors is recommended. Apply silicone where the screws/anchor penetrates the panel.
About Us
All have their benefits, yet they all bring various sets of challenges:
The Problems with Other Tub & Shower Panel Systems
- Some are really expensive to purchase and costly to install.
- Some need to acclimatize for 2 to 3 days in situ prior to being installed and must be stored flat (who has the room, especially in a condo?).
- Some are really heavy and dusty to cut.
- Some are light but look and feel like plastic.
- Some require various (and properly installed) inside corners and base rails, proprietary sealants and adhesives (which add to the cost, steps to install, and messiness).
- Most require square and plumb walls, a level tub and shower base to ensure waterproofing integrity and a proper finish look (we too absolutely love plumb and square walls in shower and tub alcove, yet we seem to see them just about as often as pink lightning!)
About Us
All have their benefits, yet they all bring various sets of challenges:
The Problems with Tub & Shower Panel Systems
- Some are really expensive to purchase and costly to install.
- Some need to acclimatize for 2 to 3 days in situ prior to being installed and must be stored flat (who has the room, especially in a condo?).
- Some are really heavy and dusty to cut.
- Some are light but look and feel like plastic.
- Some require various (and properly installed) inside corners and base rails, proprietary sealants and adhesives (which add to the cost, steps to install, and messiness).
- Most require square and plumb walls, a level tub and shower base to ensure waterproofing integrity and a proper finish look (we too absolutely love plumb and square walls in shower and tub alcove, yet we seem to see them just about as often as pink lightning!)
The Solution
We created a solution: Quickbath Panels (patent pending) are waterproof, elegant, easy-to-clean and easy to install- yes, even if your walls, ceilings or fixtures are not plumb/square/level.
Designed by installers for installers and homeowners’ peace of mind.
Proudly manufactured in Canada by QuickBath Solutions Ltd.
